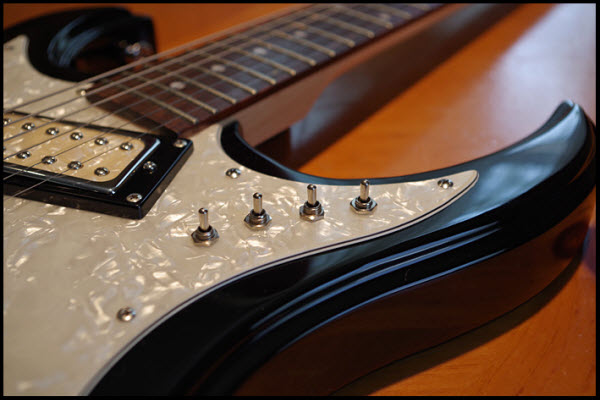
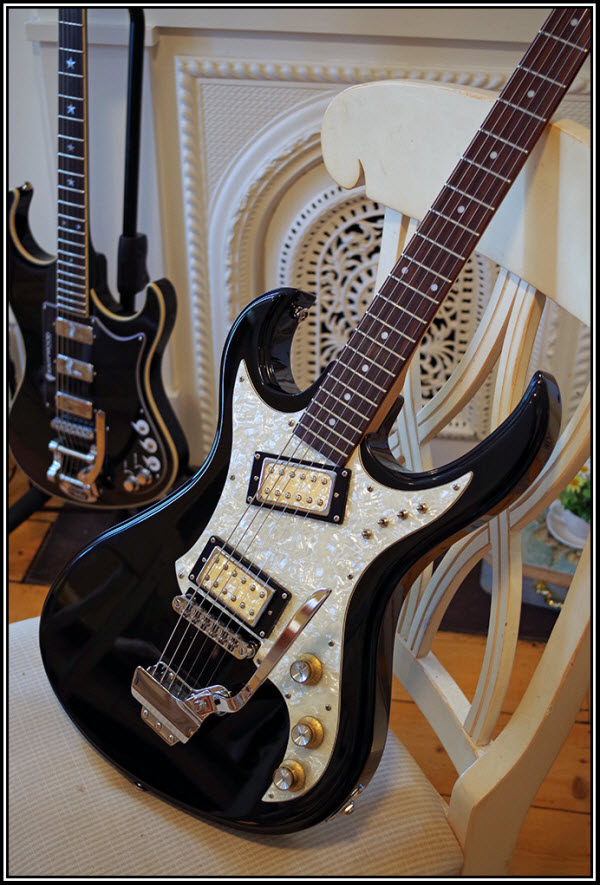
I finally got a chance to do a little actual work on my Eastwood Hummingbird, so I thought I’d send you a few pic’s. Of course, there is a chance you may not approve of the modifications, but speaking for myself, I am very happy with how it turned out. I have to tell you, it sounds frigg’n great!!! I currently own a number of guitars, but the Hummingbird has always been my favorite, I just love the way it feels… but now, after the mods… it’s really cool, I can do so much with it now. The 4 pickup switches up front provide a number of tone options, especially when combined with the new custom tone circuit at the rear.
Before we start, I’d like to mention one thing: The pickguard that is on the guitar now started out as a test mule. I was going to use it and the four switches to test out different wiring schemes, and then swap it back to the original, using one simple rotary switch in place of the original pickup selector switch. When it comes to changes, wiring & rewiring, it’s easier for me to work with 4 separate switches than one rotary.
Once I put the pickguard on the guitar however, I really liked it! In fact, I decided right then and there that it would become part of the guitars future. Yes, In the end I could have accomplish the same task using a single rotary switch or by adding a couple of Push/Pull pots, but I really like the look of the (4) switches, laid out in a slight pattern curve that flows with the lines of the body, and the existing curve of the tone controls. Yes, I actually did that on purpose… LOL!
Anyway – let’s get to it!
The pickup selection here is quite simple, if not common, but still offers a good deal of tone variations. All of the switches are DPDTCO – On-Off-On, mini switches with short throw handles to help avoid inadvertent operation during play.
Starting at the forward switch:
1) Neck Pickup, Forward Coil Tap, On/Off, In or Out of Phase.
2) Neck Pickup, Full Humbucker, On/Off, In or Out of Phase.
3) Bridge Pickup, Forward Coil Tap, On/Off, In or Out of Phase.
4) Bridge Pickup, Full Humbucker, On/Off, In or Out of Phase.
Coil Taps can be wired a couple of different ways of course. I personally prefer to separate them from the adjacent coil 100%, but in this case I chose to use traditional wiring methods.
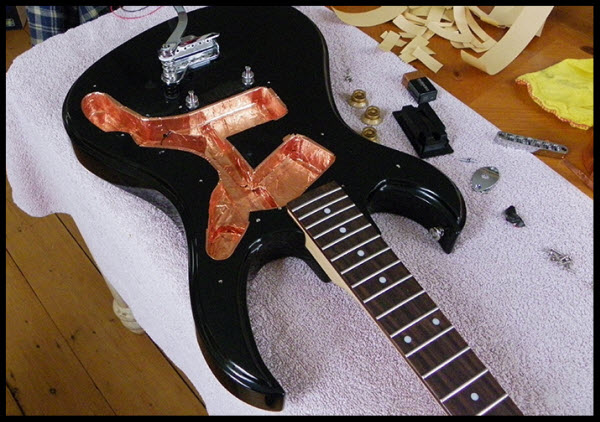
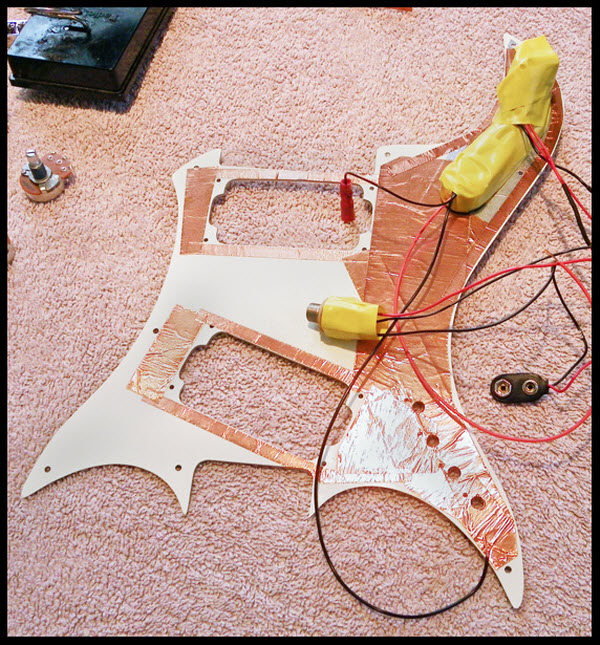
The additional tone circuit was an afterthought that came into play later during trials. It was one of those, “let’s try it and see what happens” moments. I was a little apprehensive at first because the pickups in use here are not true PAF’s. They are a bit of a blend that falls somewhere between a PAF and a Filtertron, so they have a bit of an edge on them already. I didn’t have a lot of confidence here, so for testing, I temporarily mounted the additional tone controller where the output jack was, and left the jack hanging out there in the breeze. This way if I didn’t like it, no harm-no foul, just put it back. My reservations concerning the additional tone circuit were soon laid to rest however. I found it to be a useful tool, so I relocated the input jack.
The new tone pot is an active, expander style unit, engaged or disengaged using a push/pull pot, that is only active when engaged. For the most part, it acts like the Bright Switch that you might find on certain amplifiers. It can also be used in reverse to darken the tone as well however. It comes in quite handy really.
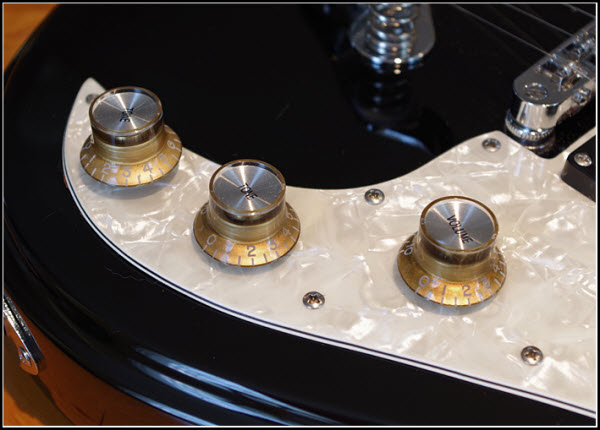
To complete the look, I changed the knobs out to the old style Silver Top Bells as well.
Post written by: Mike Egan

This is awesome, you should post a demo video where you give some brief explanations and show off its tones and capabilities!
This guitar is right up my alley! I have done a similar crazy switch build with my triple pickup explorer (it came to me with ZERO original parts, so I did not feel bad putting crazy stuff on it.) It had 5 extra holes and a enlarged cavity, so I used the same dream pickups and put a p90 style one in the middle. I went with 3 switches for pickup on-off, and 2 cut coil switches. I need to re work the tone circuit as it is currently a dummy knob, but I like your active circuit idea as I usually dislike passive tone knobs.
Thanks for sharing!
dude why did you guys stop making this and the ICHIBAN in lefty!!!!
i didnt have a job for a while and slobbered over both of those guitars for some time! by the time i saved they weren’t available!!!
your hummingbird looks awesome. its fittingly retro with all those switches!
you should post some vids!
Coil “Taps” or Coil “Cuts”…?
awesome project! I’m working on a hummingbird build right now myself. a question for you tho: do you know what the body length of your guitar is from the nut end of the bridge pocket to the strap button is? I’ve looked a couple of 60s hummingbirds and the body shapes and overall dimensions seem to very over the years. just wondering the dimensions of the eastwood reissue.
anyway, thanks! rad guitar!
Excellent work. I agree, post a demo!
Awesome guitar!! I’ve gotta get me one of those!
Great mod, i’m also a hummingbird player, an indigo one, now its loaded with a dimarzio fred, dual sound wiring, no need for a neck pickup, i also own a full stand of guitars, such as fenders, vox, hagstroms, reverend, but the eastwood is and will always be my favorite guitar
‘Coil Splits’ not ‘Taps’
‘Coil Split’ Coils are separated into two single coils. Easily done with 4 wire humbuckers. Just separate the wiring on the two single coils.
‘Coil Tap’ Coil is ‘tapped’ midway through the coil windings to increase the output of the pickup. You are basically reducing the resistance by eliminating some of the windings.
I’ve never seen a home coil split that was successful without butchering the pickup or the casing. A coil tap is usually done at manufacturing. Coil taps can really change the sound of a guitar. Especially if you start with a single coil and tap it. Taping a humbucker is like walking around on one leg. It just doesn’t work well. You end up with a thin sound that just won’t blend with the rest of the guitar. (unless that’s what you want) :: )